Convolutional Neural Networks for Dog Breed Identification
Part 1
Juan E. Rolon, 2018.
In this notebook, I provide a fully working code that has already been reviewed by AI and Machine Learning practitioners. Additional functionality can be added according to the particular user application. The specifics of the implementation are marked in the code block with a 'TODO' statement.
I developed this report as part of the requirements to obtain the Machine Learning Nanodegree from Udacity
Introduction
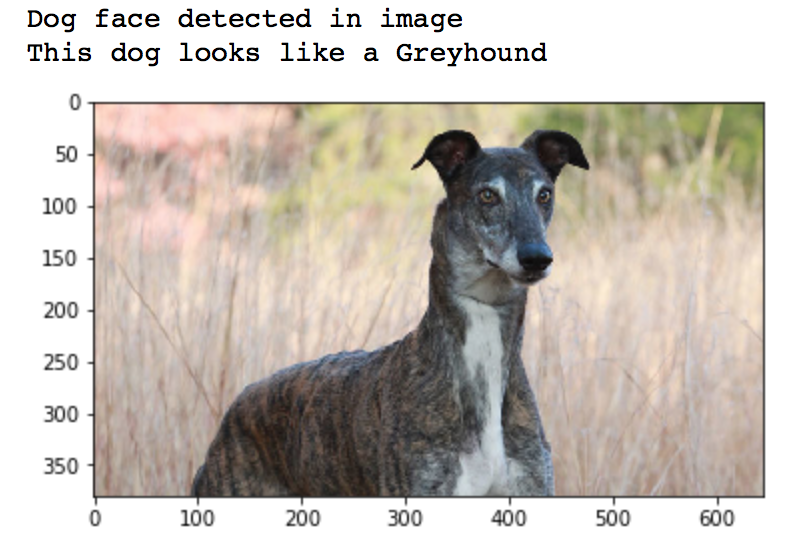
In this notebook, I take a series of steps towards developing an image classification algorithm for dog breed identification that could be incorporated into a mobile or web-based application. The end goal of the application is to accept any user-supplied image as input. If a dog is detected in the image, the classifier will provide an estimate of the dog's breed. If a human is detected, it will provide an estimate of the dog breed that is most resembling. The image below displays potential sample output.
In this real-world setting, we piece together a series of models to perform different tasks; for instance, the algorithm that detects humans in an image will be different from the CNN that infers dog breed. Be aware that there are many points of improvement and to date no AI image classifier is 100% accurate.
Workflow
The notebook is divided into separate steps. Feel free to use the links below to navigate the notebook.
- Import Datasets
- Detect Humans
- Detect Dogs
- Create a CNN to Classify Dog Breeds (from Scratch)
- Use a CNN to Classify Dog Breeds (using Transfer Learning)
- Create a CNN to Classify Dog Breeds (using Transfer Learning)
- Write Algorithm
- Test Algorithm
Import Datasets
Import Dog Dataset
In the code cell below, we import a dataset of dog images. We populate a few variables through the use of the load_files function from the scikit-learn library:
train_files,valid_files,test_files- numpy arrays containing file paths to imagestrain_targets,valid_targets,test_targets- numpy arrays containing onehot-encoded classification labelsdog_names- list of string-valued dog breed names for translating labels
Initialize and configure tensorflow session for GPU deployment.
I will be running code using tensorflow with GPU support. Below, I configured a tensorflow session manually to allow the tensorflow Keras backend to utilize a single GPU. We can either select to incrementally use or allocate a portion of the available GPU memory to the current session.
#@Juan E. Rolon
#https://github.com/juanerolon/
#Udacity Machine Learning Nanodegree

import tensorflow as tf
from keras.backend.tensorflow_backend import set_session
config = tf.ConfigProto()

#Set to True to allow GPU dynamic memory incremental allocation
#Note: memory is not deallocated automatically
if True:
    config.gpu_options.allow_growth = True
    print("GPU memory incrementally allocated for current tensorflow session")

#Set to True if you decide to allocate a specific fraction of the total GPU
#memory to the current tensorflow session
if False:
    mem_frac = 0.3
    config.gpu_options.per_process_gpu_memory_fraction = mem_frac
    print("GPU memory allocated for current tensorflow session = {}".format(mem_frac))

set_session(tf.Session(config=config))

#Note: Use the NVIDIA System Management Interface to monitor periodically your gpu compute devices
#      memory, e.g. $nvdia-smi from bash or using the cell below

!nvidia-smi
Generic image loader (used to load my stored validation curves).
import cv2
import matplotlib.pyplot as plt
%matplotlib inline

def show_image(img_path):
    img = cv2.imread(img_path)
    cv_rgb = cv2.cvtColor(img, cv2.COLOR_BGR2RGB)
    plt.figure(figsize = (13.0,6.0))
    imgplot = plt.imshow(cv_rgb, interpolation='none',aspect='auto')
Import the Dog Dataset
from sklearn.datasets import load_files
from keras.utils import np_utils
import numpy as np
from glob import glob

# define function to load train, test, and validation datasets
def load_dataset(path):
    data = load_files(path)
    dog_files = np.array(data['filenames'])
    dog_targets = np_utils.to_categorical(np.array(data['target']), 133)
    return dog_files, dog_targets

# load train, test, and validation datasets
train_files, train_targets = load_dataset('dogImages/train')
valid_files, valid_targets = load_dataset('dogImages/valid')
test_files, test_targets = load_dataset('dogImages/test')

# load list of dog names
dog_names = [item[20:-1] for item in sorted(glob("dogImages/train/*/"))]

# print statistics about the dataset
print('There are %d total dog categories.' % len(dog_names))
print('There are %s total dog images.\n' % len(np.hstack([train_files, valid_files, test_files])))
print('There are %d training dog images.' % len(train_files))
print('There are %d validation dog images.' % len(valid_files))
print('There are %d test dog images.'% len(test_files))
Import Human Dataset
In the code cell below, we import a dataset of human images, where the file paths are stored in the numpy array human_files.
import random
random.seed(8675309)

# load filenames in shuffled human dataset
human_files = np.array(glob("lfw/*/*"))
random.shuffle(human_files)

# print statistics about the dataset
print('There are %d total human images.' % len(human_files))
Detecting Human Faces
We use OpenCV's implementation of Haar feature-based cascade classifiers to detect human faces in images. OpenCV provides many pre-trained face detectors, stored as XML files on github. We have downloaded one of these detectors and stored it in the haarcascades directory.
In the next code cell, we demonstrate how to use this detector to find human faces in a sample image.
import cv2
import matplotlib.pyplot as plt
%matplotlib inline

# extract pre-trained face detector
face_cascade = cv2.CascadeClassifier('haarcascades/haarcascade_frontalface_alt.xml')

# load color (BGR) image
img = cv2.imread(human_files[3])
# convert BGR image to grayscale
gray = cv2.cvtColor(img, cv2.COLOR_BGR2GRAY)

# find faces in image
faces = face_cascade.detectMultiScale(gray)

# print number of faces detected in the image
print('Number of faces detected:', len(faces))

# get bounding box for each detected face
for (x,y,w,h) in faces:
    # add bounding box to color image
    cv2.rectangle(img,(x,y),(x+w,y+h),(255,0,0),2)

# convert BGR image to RGB for plotting
cv_rgb = cv2.cvtColor(img, cv2.COLOR_BGR2RGB)

# display the image, along with bounding box
plt.imshow(cv_rgb)
plt.show()

Before using any of the face detectors, it is standard procedure to convert the images to grayscale. The detectMultiScale function executes the classifier stored in face_cascade and takes the grayscale image as a parameter.
In the above code, faces is a numpy array of detected faces, where each row corresponds to a detected face. Each detected face is a 1D array with four entries that specifies the bounding box of the detected face. The first two entries in the array (extracted in the above code as x and y) specify the horizontal and vertical positions of the top left corner of the bounding box. The last two entries in the array (extracted here as w and h) specify the width and height of the box.
Write a Human Face Detector
We can use this procedure to write a function that returns True if a human face is detected in an image and False otherwise. This function, aptly named face_detector, takes a string-valued file path to an image as input and appears in the code block below.
# returns "True" if face is detected in image stored at img_path
def face_detector(img_path):
    img = cv2.imread(img_path)
    gray = cv2.cvtColor(img, cv2.COLOR_BGR2GRAY)
    faces = face_cascade.detectMultiScale(gray)
    return len(faces) > 0
Assessing the Human Face Detector
We use the code cell below to test the performance of the face_detector function. In particular we want to know the following:
- What percentage of the first 100 images in
human_fileshave a detected human face? - What percentage of the first 100 images in
dog_fileshave a detected human face?
Ideally, we would like 100% of human images with a detected face and 0% of dog images with a detected face. At this point the algorithm falls short of this goal, but still gives acceptable performance. We extract the file paths for the first 100 images from each of the datasets and store them in the numpy arrays human_files_short and dog_files_short.
Analysis:
We aim to answer the following questions for an initial assessment of the human face detector:
- What percentage of the first 100 images in
human_fileshave a detected human face?
Ans: Percentage of human faces detected in short human_files dataset: 98%
- What percentage of the first 100 images in
dog_fileshave a detected human face?
Ans: Percentage of human faces detected in short dog_files dataset: 11%
human_files_short = human_files[:100]
dog_files_short = train_files[:100]
# Do NOT modify the code above this line.


s1, s2 = 0, 0
for human_ipath in human_files_short:
    s1 += face_detector(human_ipath)
for dog_ipath in dog_files_short:
    s2 += face_detector(dog_ipath)

print("Percentage of human faces detected in short human_files dataset: {}".format(s1))
print("Percentage of human faces detected in short dog_files dataset: {}".format(s2))
Image Preprocessing Considerations for Facial Image Recognition
The above algorithmic choice necessitates that we communicate to the user that we accept human images only when they provide a clear view of a face (otherwise, we risk having unneccessarily frustrated users!).
Analysis:
In principle we would like to detect faces regardless of their location, orientation, spatial depth or their interlayering with other objects; or even when the image contains defects, or has a low resolution, etc.. As mentioned earlier, face detection with ideal accuracy (99.99%) continues to be challenging.
Here are some opinions on image recognition procedures:
Image pre-processing: apply linear, projective, and non-linear transformations to standardize images into an optimal format before feeding them into the CNN algorithm. In particular if the original image appears blurry, or distorted in some fashion.</font>
Image pre-processing: apply integral transforms such as the discrete Fourier Transform, Wavelet Transform, etc. to aid or speed-up feature extraction within the convolutional layers.
Raw dataset augmentation: augment dataset with raw images containing wide variations of human faces with different locations, orientations, spatial depth and rich context (highly interlayered with other objects).
In this project we use OpenCV to exclusively detect human images in the algorithm, but is also possible to use deep learning techniques in the same way as we do for dog images.
Detecting Dogs
In this section, we use a pre-trained ResNet-50 model to detect dogs in images. Our first line of code downloads the ResNet-50 model, along with weights that have been trained on ImageNet, a very large, very popular dataset used for image classification and other vision tasks. ImageNet contains over 10 million URLs, each linking to an image containing an object from one of 1000 categories. Given an image, this pre-trained ResNet-50 model returns a prediction (derived from the available categories in ImageNet) for the object that is contained in the image.
from keras.applications.resnet50 import ResNet50

# define ResNet50 model
ResNet50_model = ResNet50(weights='imagenet')
After executing the previous cell, tensorflow requests a bit of extra memory ~ 0.3GB. Check the compute process below.
!nvidia-smi
Pre-process the Data
When using TensorFlow as backend, Keras CNNs require a 4D array (which we'll also refer to as a 4D tensor) as input, with shape
$$ (\text{nb_samples}, \text{rows}, \text{columns}, \text{channels}), $$where nb_samples corresponds to the total number of images (or samples), and rows, columns, and channels correspond to the number of rows, columns, and channels for each image, respectively.
The path_to_tensor function below takes a string-valued file path to a color image as input and returns a 4D tensor suitable for supplying to a Keras CNN. The function first loads the image and resizes it to a square image that is $224 \times 224$ pixels. Next, the image is converted to an array, which is then resized to a 4D tensor. In this case, since we are working with color images, each image has three channels. Likewise, since we are processing a single image (or sample), the returned tensor will always have shape
The paths_to_tensor function takes a numpy array of string-valued image paths as input and returns a 4D tensor with shape
Here, nb_samples is the number of samples, or number of images, in the supplied array of image paths. It is best to think of nb_samples as the number of 3D tensors (where each 3D tensor corresponds to a different image) in the dataset!
from keras.preprocessing import image
from tqdm import tqdm

def path_to_tensor(img_path):
    # loads RGB image as PIL.Image.Image type
    img = image.load_img(img_path, target_size=(224, 224))
    # convert PIL.Image.Image type to 3D tensor with shape (224, 224, 3)
    x = image.img_to_array(img)
    # convert 3D tensor to 4D tensor with shape (1, 224, 224, 3) and return 4D tensor
    return np.expand_dims(x, axis=0)

def paths_to_tensor(img_paths):
    list_of_tensors = [path_to_tensor(img_path) for img_path in tqdm(img_paths)]
    return np.vstack(list_of_tensors)
Making Predictions with ResNet-50
Getting the 4D tensor ready for ResNet-50, and for any other pre-trained model in Keras, requires some additional processing. First, the RGB image is converted to BGR by reordering the channels. All pre-trained models have the additional normalization step that the mean pixel (expressed in RGB as $[103.939, 116.779, 123.68]$ and calculated from all pixels in all images in ImageNet) must be subtracted from every pixel in each image. This is implemented in the imported function preprocess_input. We can check the code for preprocess_input here.
Now that we have a way to format our image for supplying to ResNet-50, we are now ready to use the model to extract the predictions. This is accomplished with the predict method, which returns an array whose $i$-th entry is the model's predicted probability that the image belongs to the $i$-th ImageNet category. This is implemented in the ResNet50_predict_labels function below.
By taking the argmax of the predicted probability vector, we obtain an integer corresponding to the model's predicted object class, which we can identify with an object category through the use of this dictionary.
from keras.applications.resnet50 import preprocess_input, decode_predictions

def ResNet50_predict_labels(img_path):
    # returns prediction vector for image located at img_path
    img = preprocess_input(path_to_tensor(img_path))
    return np.argmax(ResNet50_model.predict(img))
Write a Dog Detector
While looking at the dictionary, we notice that the categories corresponding to dogs appear in an uninterrupted sequence and correspond to dictionary keys 151-268, inclusive, to include all categories from 'Chihuahua' to 'Mexican hairless'. Thus, in order to check to see if an image is predicted to contain a dog by the pre-trained ResNet-50 model, we need only check if the ResNet50_predict_labels function above returns a value between 151 and 268 (inclusive).
We use these ideas to complete the dog_detector function below, which returns True if a dog is detected in an image (and False if not).
### returns "True" if a dog is detected in the image stored at img_path
def dog_detector(img_path):
    prediction = ResNet50_predict_labels(img_path)
    return ((prediction <= 268) & (prediction >= 151))
Assess the dog breed identification algorighm
We use the code cell below to test the performance of the dog_detector function.
At this point we want to know the following:
- What percentage of the images in
human_files_shorthave a detected dog? - What percentage of the images in
dog_files_shorthave a detected dog?
Results:
- What percentage of the first 100 images in
human_fileshave a detected dog?
Percentage of dog faces detected in short human_files dataset: 1%
- What percentage of the first 100 images in
dog_fileshave a detected dog?
Percentage of dog faces detected in short dog_files dataset: 100%
human_files_short = human_files[:100]
dog_files_short = train_files[:100]
# Do NOT modify the code above this line.

s1, s2 = 0, 0
for human_ipath in human_files_short:
    s1 += dog_detector(human_ipath)
for dog_ipath in dog_files_short:
    s2 += dog_detector(dog_ipath)

print("Percentage of dog faces detected in short human_files dataset: {}".format(s1))
print("Percentage of dog faces detected in short dog_files dataset: {}".format(s2))